Are you looking for an easy way to access Clarity Classic portlets and reports from Clarity Modern? We’ve got great news. Thanks to a recent Clarity enhancement from Broadcom, you can create a clean, virtually seamless integration from Clarity Modern to Classic by creating a custom Dashboard object.
Read on to learn how to create your own.
Benefits
- Easily access any Clarity Classic portlets or reports in Clarity Modern
- Segregate reporting from investments
- Limit the number of Blueprints
- You may create a channel for each Dashboard or report with a hard-coded link. However, if you choose this route, you’ll need a new Blueprint for each Dashboard.
- Access Control – Instance Rights to control users’ or groups’ access to specific Dashboard instances
Requirements
- The environment must be Clarity 15.9.1 or newer to support Channels on Custom Objects and object attribute references
- Optional: The Phoenix user interface (UI) must be enabled in Classic to hide the Classic navigation bar and tabs
Clarity Classic Configuration
We’ll begin by creating a custom object in Clarity Classic, which involves the following steps:
- Ensure that the object is API Enabled
- Set up Auto-Numbering for the ID
- Create an API-enabled string attribute and note the API Attribute ID
Custom Object Configuration
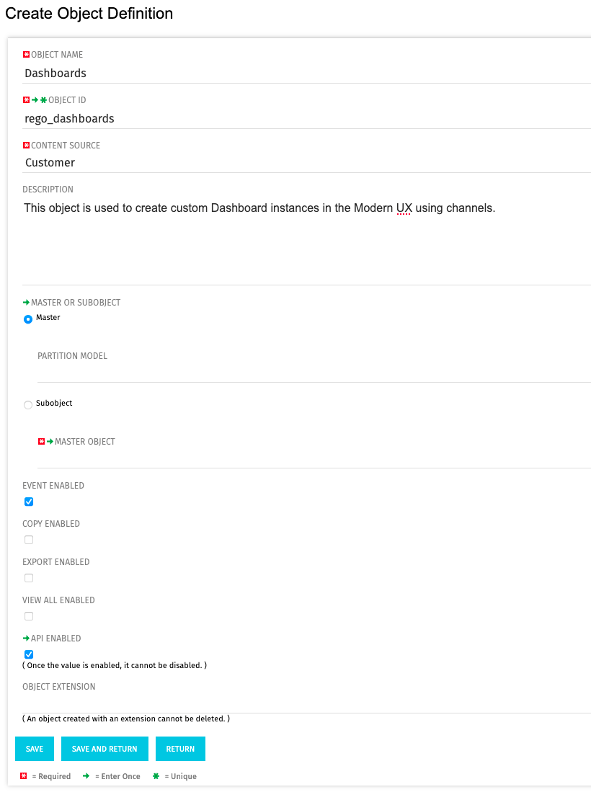
1) Create a new object. Be sure to make it API-enabled by selecting the API Enabled checkbox as shown below.
2) Set up auto-numbering on the ID attribute. The following example shows an optional ‘Description’ string attribute to provide feedback or instructions to the end users.

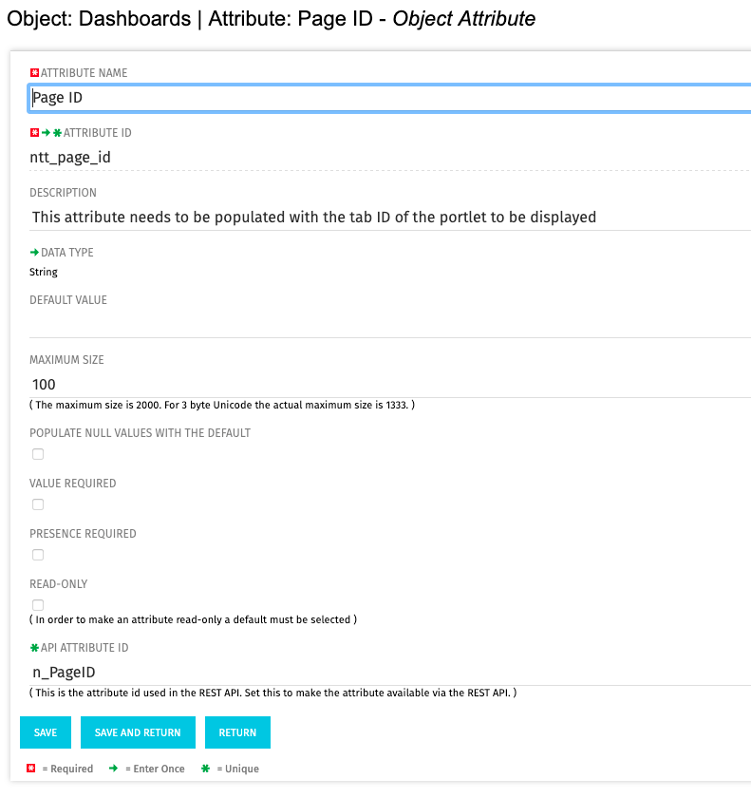
3) Create a string field to house the Page ID of the portlet that we’ll link to in the Channel. Make a note the API Attribute ID, as it will be referenced it in the URL.
Clarity Modern Configuration
To complete the integration, we’ll switch to Clarity Modern to perform the last steps:
- Create a new Blueprint for the Custom Object
- Make it the Default
- Add a single Channel as the only module
- Secure Attributes:
- Although users will not have Edit access, we suggest hiding attributes they don’t need to access.
- Create a Dashboard instance and add the portlet page ID
Modern Blueprint Configuration
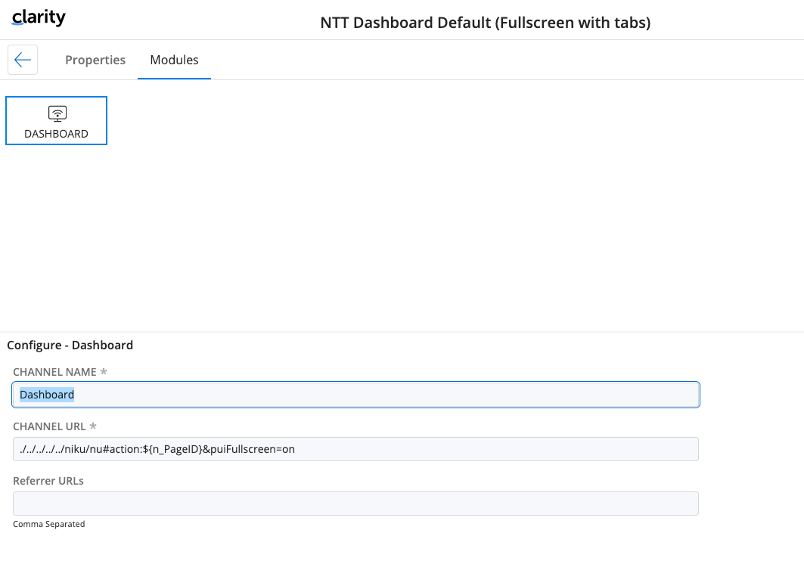
1) In the Modern UX, set up a new default Blueprint with one Channel module. The URL should be:
./../../../../niku/nu#action:$&puiFullscreen=on
Note that the n_PageID is the API Attribute ID from the custom attribute. In the following example, we’re using the Fullscreen option but not the HideTabs option. To utilize HideTabs, insert &puiHidePPMTabs=on in the URL. You may also create two or three blueprints to represent each type (Fullscreen, with or without HideTabs).
Remember that the Fullscreen and HideTabs tags only work when the Phoenix UI is applied.
Field Level Security
2) Secure the Blueprint to ensure the end users only have access to the Name and Description attributes as shown in the following example:

Dashboard
3) Next, create a new Dashboard instance.
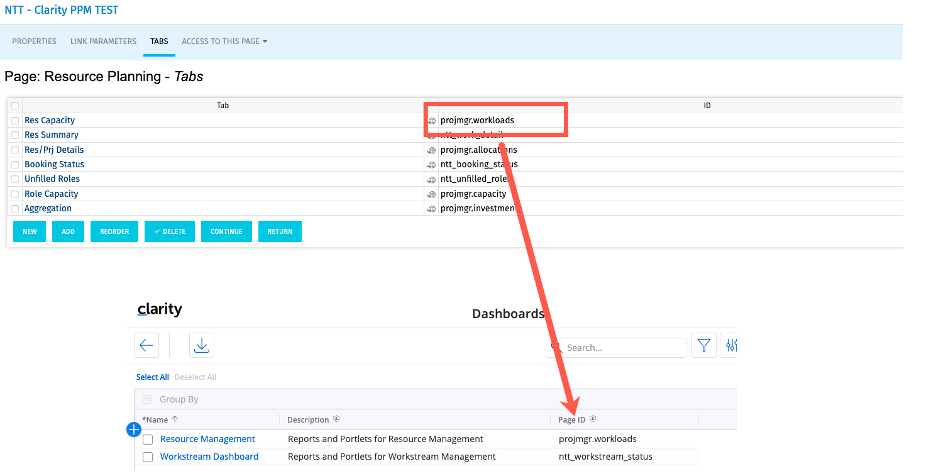
4) Add the ‘Page ID’ attribute, and populate it with the page ID of your portlet:
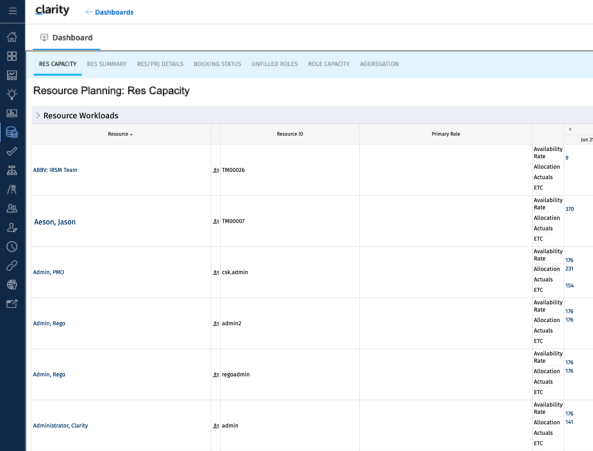
The Channel will pass the Page ID into the URL string and present users with the appropriate portlet:
Let Rego Be Your Clarity Guide
Whether it’s creating custom objects or upgrading to a new release, Rego’s Clarity experts are here to help you streamline PPM with Clarity. Contact us today for a no pressure chat to discuss our end-to-end services.
Rego also offers free configuration and adoption assessments, webinars, and half-day training classes for Clarity and Rally. For a full list of our services, visit regoconsulting.com.
