
By now, you’ve probably heard a lot of discussion about Roadmaps. In Clarity, Roadmaps are a strategic toolset that helps companies visualize, communicate, and describe a product that will be built.
But, how do you create a Roadmap? And once it’s created, how do you get items into it? We’re glad that you asked.
Here’s a quick walkthrough to show you how the process works, and how Roadmaps as a whole can help elevate your PPM game.
Create a Roadmap
The first step is to identify your Roadmap’s properties, including the time horizon, or duration, to be included. However, these Roadmap duration options are limited to the fiscal periods set up in your Clarity environment. For example, let’s say you set 2020 as your start period but only have fiscal periods established through 2022. The only available duration options for your Roadmap in this scenario will be one or two years.
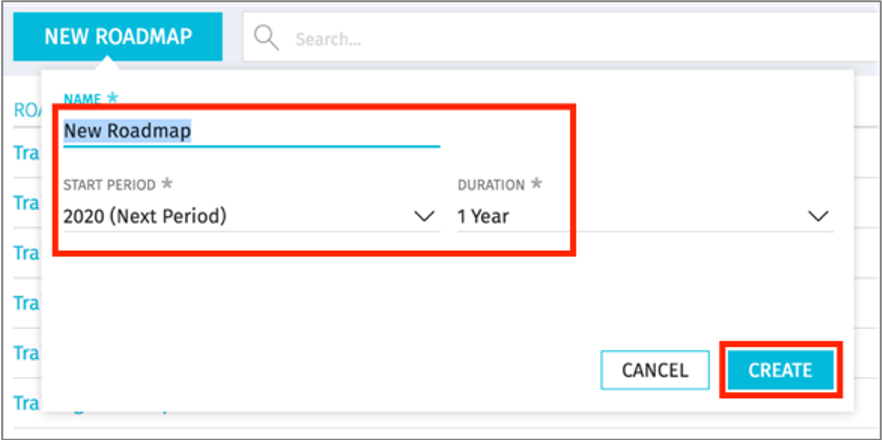
As with Classic PPM Portfolios, the Roadmap duration can limit what data is viewable for carryover/multi-year projects and for projects that fall outside the Roadmap’s time horizon.
Populate a Roadmap
There are three ways to populate Items into a Roadmap:
- Import from PPM (Projects, Ideas or Custom Investments)
- Import from CSV (.csv)
- Create manually
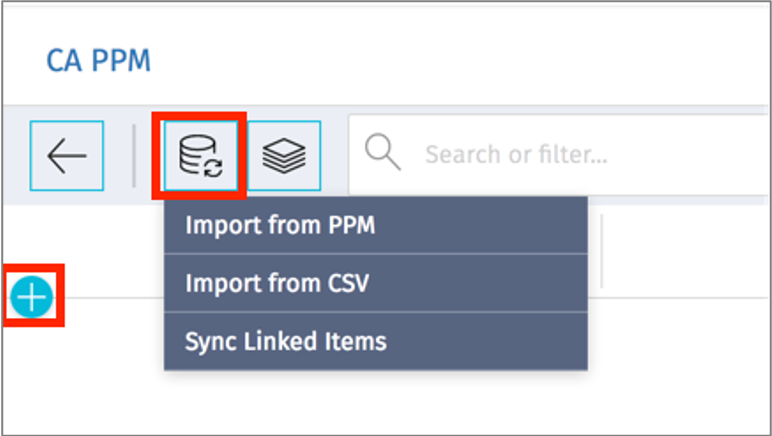
Let’s take a quick look at each option.
Option 1: Import from PPM

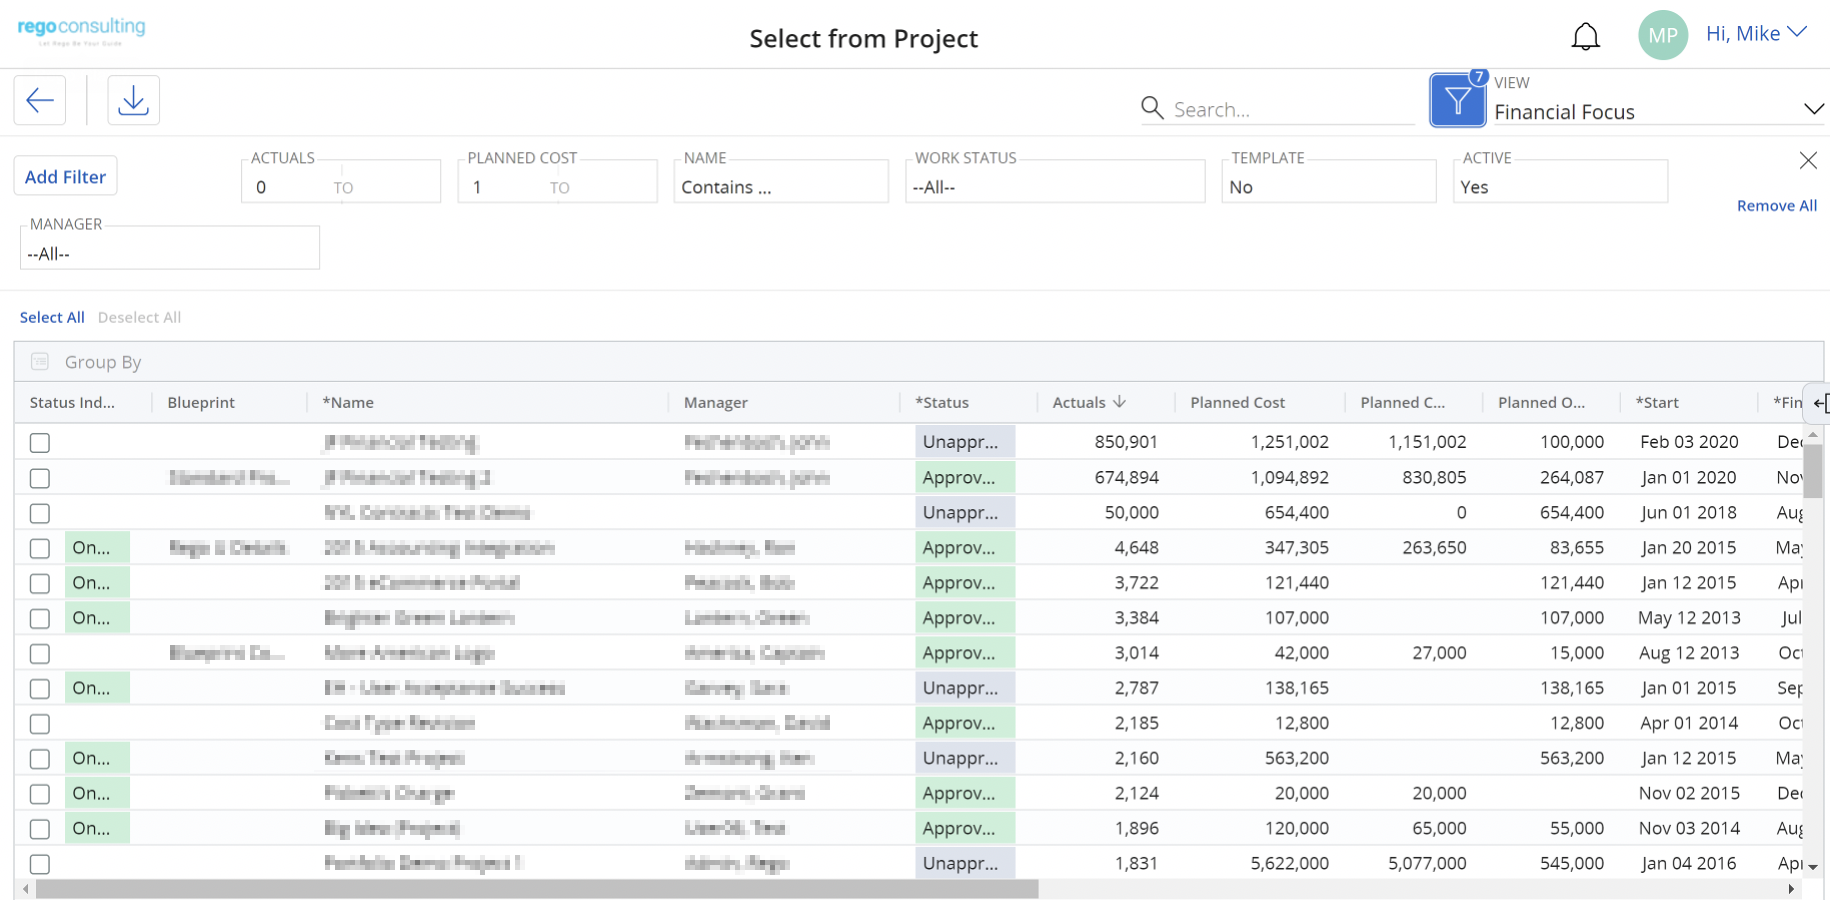
This option will allow you to add to the Roadmap Projects – but not programs – and Custom Investments that already exist in PPM. The sample options listed here are Marketing Plans, Ideas, and Projects, but your list would include whatever Custom Investments you create.
You can Import items by OBS or individually (or both). Upon making your selection, the contents will begin to import to the Roadmap, and depending on your environment, import/sync may take a few minutes.

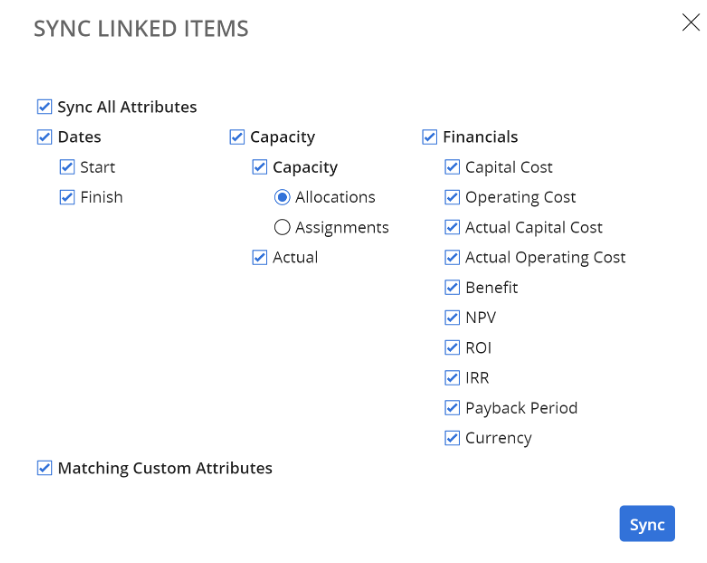
The attributes below are imported and/or synced to your Roadmap, and may be analyzed within the Roadmap:
Option 2: Import from CSV
If necessary, you may utilize the Import from .csv file option to import data into your Roadmap. This functionality is a holdover from earlier Roadmap versions that did not allow for the import of PPM content but may still be utilized.
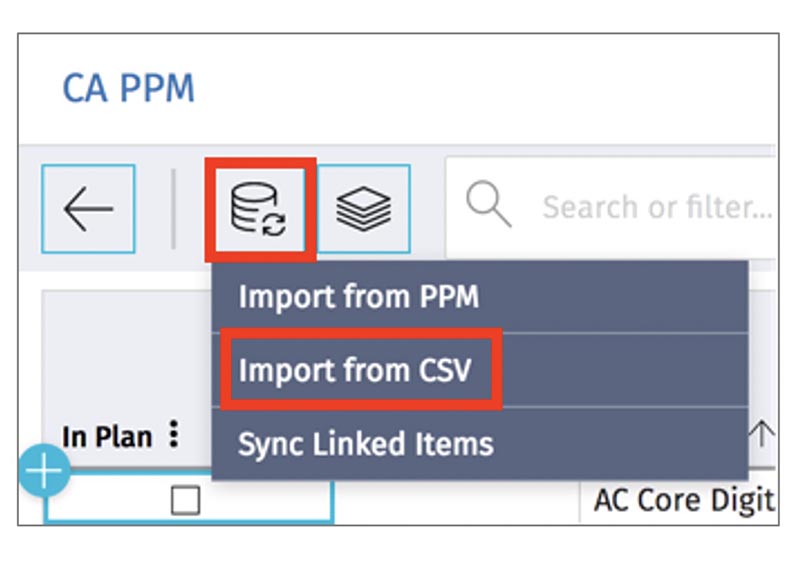
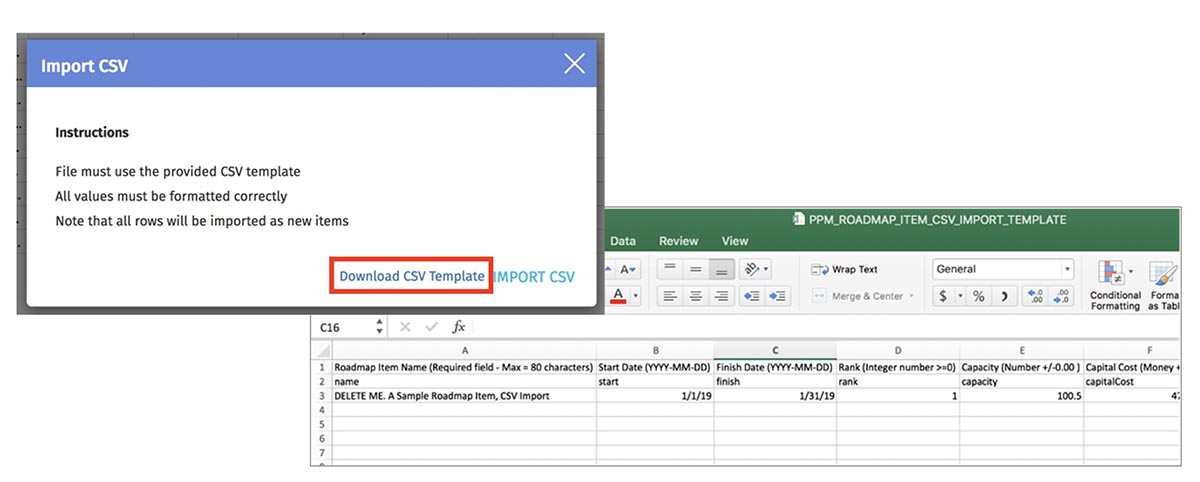
The first step is to download the provided CSV template. Next, enter your data in the template and import it back into your Roadmap using the Import CSV link.
Option 3: Create Manually
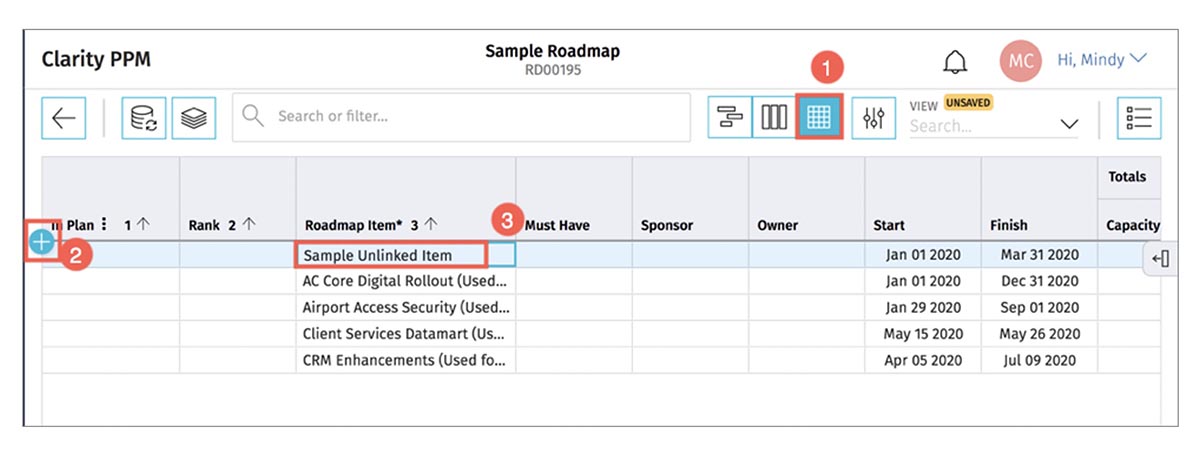
The final method of populating items in a Roadmap is to create them manually. This can be accomplished within each of the three Roadmap views: Grid, Timeline, and Board.
Within Grid View:
To create standalone items in the grid view, click the plus sign (+) and enter the Roadmap Item Name.
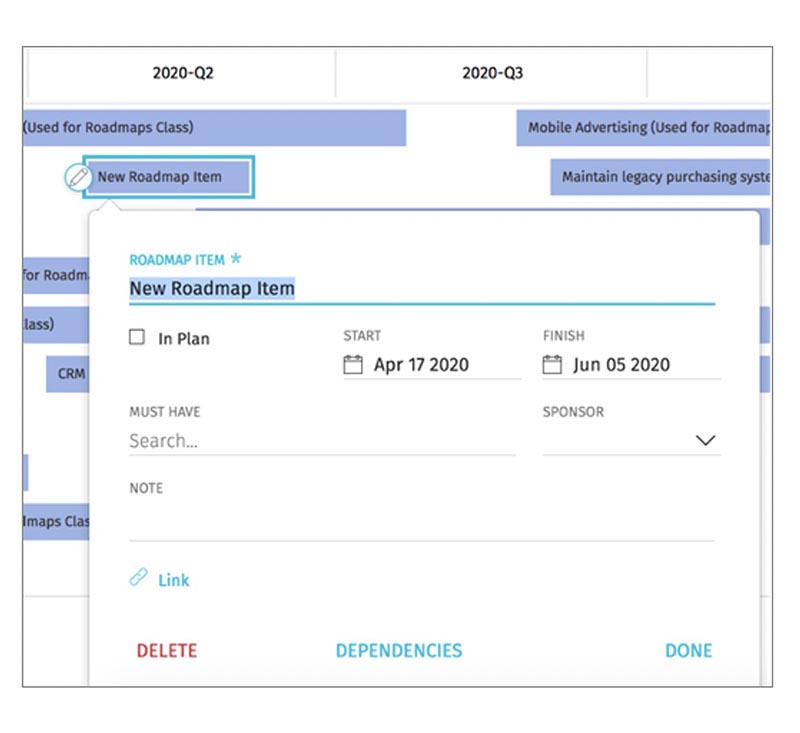
Within Timeline View:
In the Timeline view, use a simple drag-and-drop to create standalone items.

You can then populate the attributes and, if necessary, link the item to an existing Clarity Project or Custom Investment.
Within Board View:
Click the plus sign (+) to create an Item from the Board view. It’s important to note that for manually created items, you can update the Roadmap Item data, including the financials, capacity, etc., to represent an accurate picture of the placeholder item.

Let Rego Guide Your Roadmap Journey
Whether you are thinking about – or diving headfirst – into Clarity Roadmaps, our industry experts are always ready to assist if you have questions. We have real-world examples and experience to take your business to the next level. Visit us at regoconsulting.com today.
Rego also offers free webinars, white papers, and training courses for Clarity.

